Virtual show | SEMICONDUCTORS & ELECTRONICS

Maintain accuracy through metrology and inspection

Machines in the semiconductor and electronics manufacturing industry are subject to extreme requirements and loads.
By compensating for errors that arise during operation, HEIDENHAIN solutions enable optimal quality and productivity across the entire service life of machines engaged in critical processes:

Thin-film measurement, overlay metrology, FEOL lithography, photomask inspection, post-bonding inspection, bump inspection, and TSV inspection

HEIDENHAIN at SEMICON: Empower Technology

The HEIDENHAIN GROUP is your partner for solutions
combining precision, dynamic performance, practical value, and reliability.

Join us in breaking the accuracy barrier.
Discover our pioneering innovations
that unlock the N+1 process node.

SEMICON West: October 7 to 9, 2025
Digital SEMICON EVENT: October 27 to 31 and November 10 to 14, 2025

MULTI-DOF TECHNOLOGY:
Keep the accuracy in your application

The easy way to check your machine’s accuracy: our calibration tool based on the LIP 6000 Dplus

Inspect and adjust your machine anytime using our calibration tool based on the LIP 6000 Dplus. Calibrating your machines isn’t a daily event, so you can also rent our tool as a HEIDENHAIN service without needing to purchase and maintain one of your own. Our certified calibration tool is a convenient way to check the accuracy of your systems on an as-needed basis.

New

PP 6000: two measuring directions for greater accuracy

Abbé errors have a negative effect on machine tool accuracy. Measuring them is normally difficult, but not with the PP 6000 two-coordinate encoder. Using a single scanning head, this encoder measures two directions simultaneously across a 464 mm x 464 mm field, with larger fields available upon request. By measuring the tool center point directly, it allows you to minimize Abbé errors and improve the accuracy of your machine. Its dual position feedback is transmitted over a single cable using the EnDat 3 interface, thereby reducing your cabling and setup work. Optimize the dynamic behavior of your motion system with the PP 6000.

New

Easily utilize full encoder accuracy in your application.

MRP 8081 Dplus: take full advantage of your encoder’s accuracy

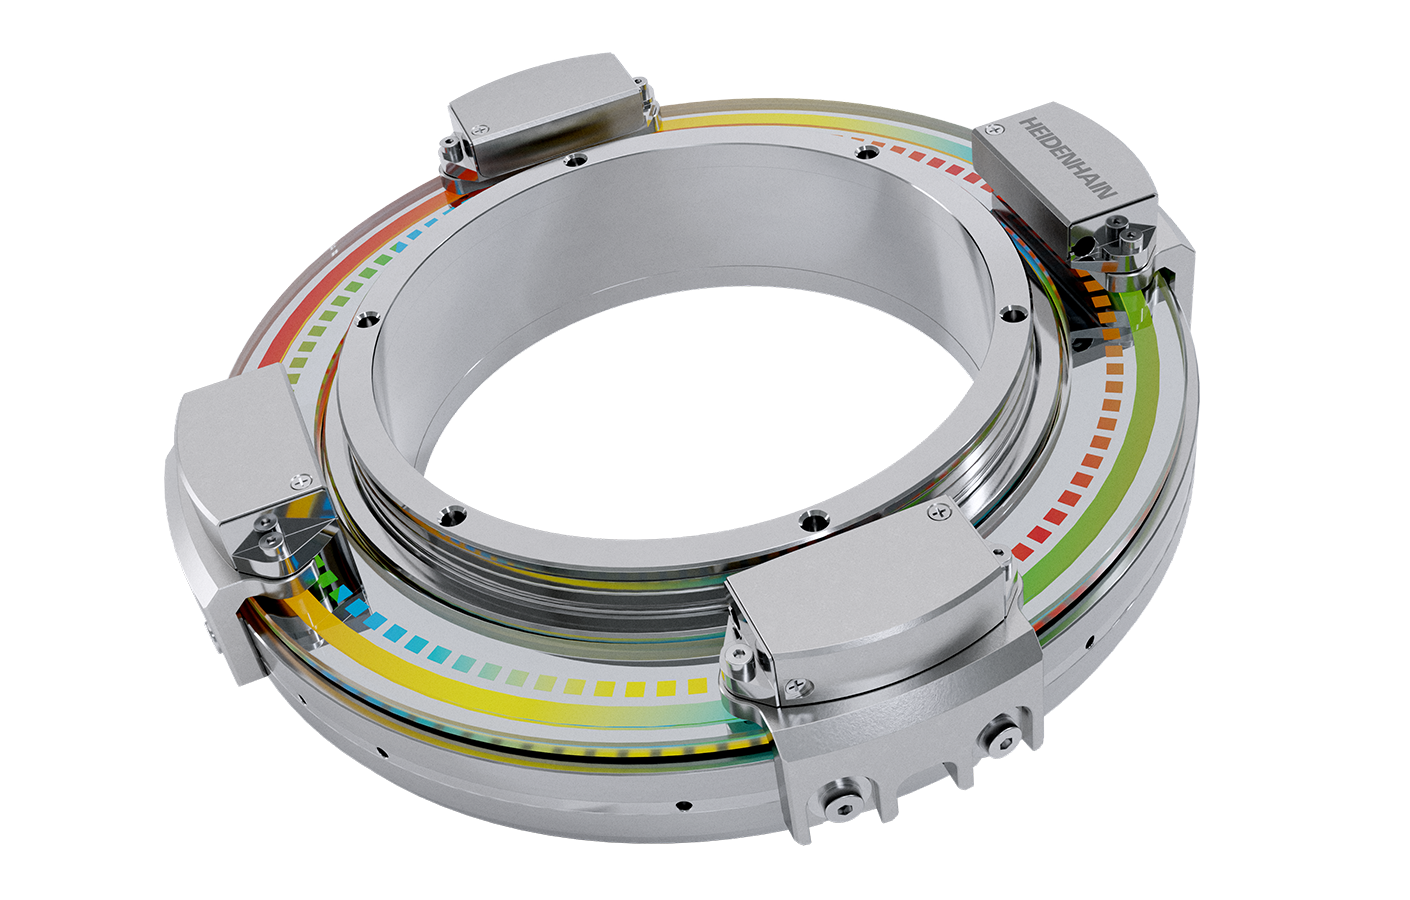
Despite your encoder’s certified accuracy and calibration chart, you may not be using its full accuracy within your application. There are many possible reasons for this, especially when the encoder is mounted to insufficiently rigid parts. The MRP 8081 Dplus with TRANSFERABLE ACCURACY ensures that the specified accuracy isn’t diminished by the application. This technology utilizes the following features:

  • A highly robust bearing unit
  • Four scanning heads
  • A calibration-relevant data set for your control

Thanks to these features, the MRP 8081 Dplus achieves a system accuracy of up to ±0.2 arc seconds, regardless of the given mounting circumstances, tilting loads or other external factors such as vibrations, sudden physical loads and temperature fluctuations. This increases both accuracy and performance, allowing you to increase your motor’s speed without sacrificing accuracy.

In addition to high-accuracy angular measurement, the four scanning heads of the MRP 8081 Dplus also measure the radial guideway inaccuracy of an axis. In the future, special electronics for analyzing the four scanning heads will allow you to compensate for this as well.

New

Explore our media library!

Stay up to date about our high-performance solutions for the semiconductor and electronics industry through our product specialist videos and technology animations.